Quickstart Guide
This will be a short guide on how to create a namespace on this Wiki for a Lemmy community on SLRPNK.
You can log into this Wiki with the same username and password as you use on the SLRPNK Lemmy instance. If you don't have an account there yet, please apply for one over there.
Due to a current bug in the wiki account integration, you need to set an email address and configure a display name in your Lemmy profile, but we are working on fixing this.
This Wiki is configured to automatically grant specific editing rights to all moderators (with local accounts) of communities on our Lemmy instance.
For example if you are the moderator of the /c/buyitforlife community, you get rights to edit the buyitforlife namespace on this Wiki. Each namespace also has its own dedicated link menu you are allowed to edit.
If the namespace has not been created yet, just use the URL input bar of your browser and add “/your-community-name:start” to the end of the Wiki address, but with the name of the community you moderate instead of “your-community-name”, similar to the above example. The “:start” part represents the landing page of your wiki namespace that you can link to. You can also create other pages on your wiki by replacing “:start” with something else, for example “:links”.
Creating Pages & Editing Menus
Once you've created your :start page for your community, you'll likely want to fill it with links and information.
To edit a page or sidebar, click the little pencil icon found on the top right of an editable area.

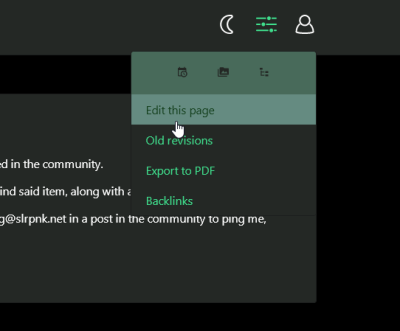
Alternatively, you can use the top right drop-down menu (the little slide-y controls icon) and select “edit this page”.

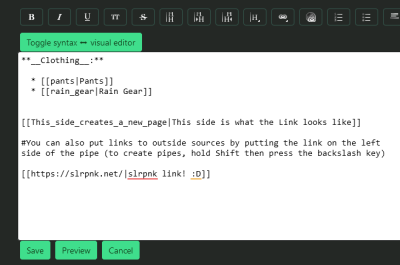
Once in the editor, you'll be able to use Markup to create links and formatting for your document, or switch to the Visual Editor and use the editor buttons to accomplish the same thing.
Let's open that Buyitforlife menu and see what the markup looks like.

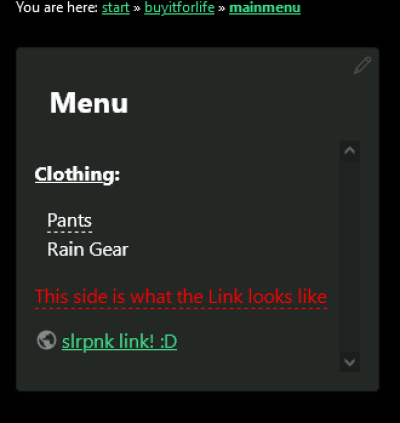
As we can see, encapsulating something in double brackets and adding a pipe symbol creates lets us create links to new pages on your wiki. Let's apply those changes and see what happens to the side menu.

Shiny.
And that's all you really need to know to rock 'n' roll on here! There's a lot more you can do, and for more detail on the formatting syntax, you'll wanna head on over to this page on Syntax. But the basics covered here are all you really need to know to have an effective wiki!
Now go! Be free! Create the wiki of your dreams! (Don't we all have those?)
